
Following on from our article How to resize an image on Windows, here is a quick guide on how to resize an image on a Mac.
When using a Mac, things are a bit more straightforward, since the only tool you need is built right into the Mac OS, with an app called Preview.
If you have any dedicated photo editing software installed on your Mac, I would suggest you use it to resize images. However, if you don’t or simply want to quickly resize one or two images, the Preview app is quick and very simple.
Remember – don’t upsize Images!
There’s a difference between resizing an image to be smaller, and resizing it to be bigger. Nearly every image editing program can scale down a photo without any issue. However, if you use these programs to make a photo larger, you will find that the photo loses a lot of quality.
How to resize an image on a Mac
IMPORTANT! The Preview app will always replace the original image file when you resize it. If you want to keep the original file, duplicate it first, then resize the duplicate and leave the original image intact.
To check the original size of your file, right click on the image and select “Get Info” from the dropdown menu. You will find the Dimensions under the “More Info” tab.
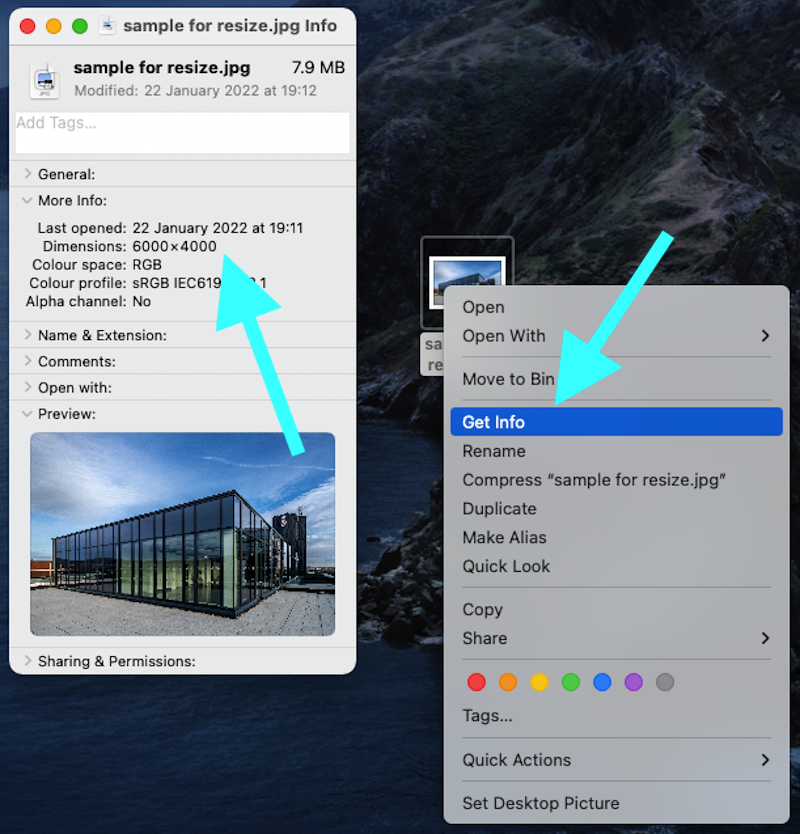
In this example, the original is 6000×4000 pixels and 7.9MB
Open the image using preview by double clicking on the file. By default, Preview will open the image. If you have assigned a different software to open image files, you will need to right click on the image and select “Open with” and select Preview.
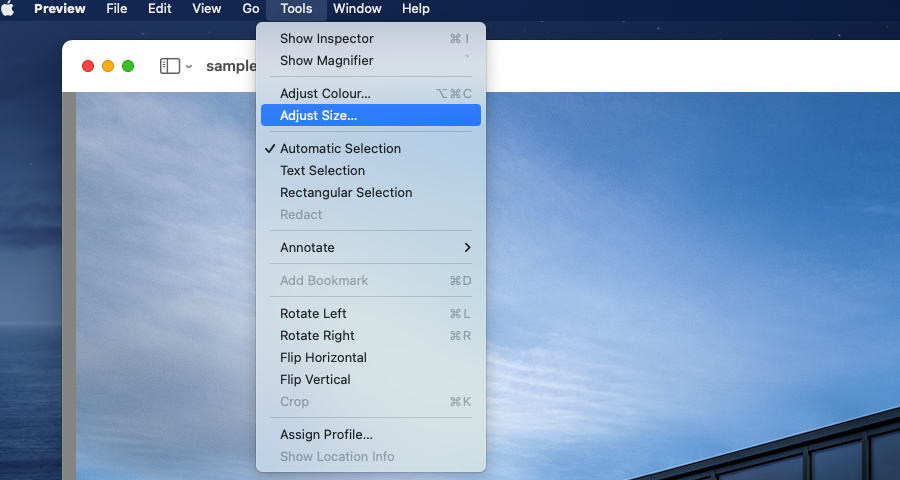
From the Tools menu, select “Adjust size…”
From this screen, you can select one of the “Fit into” presets or choose a custom size.
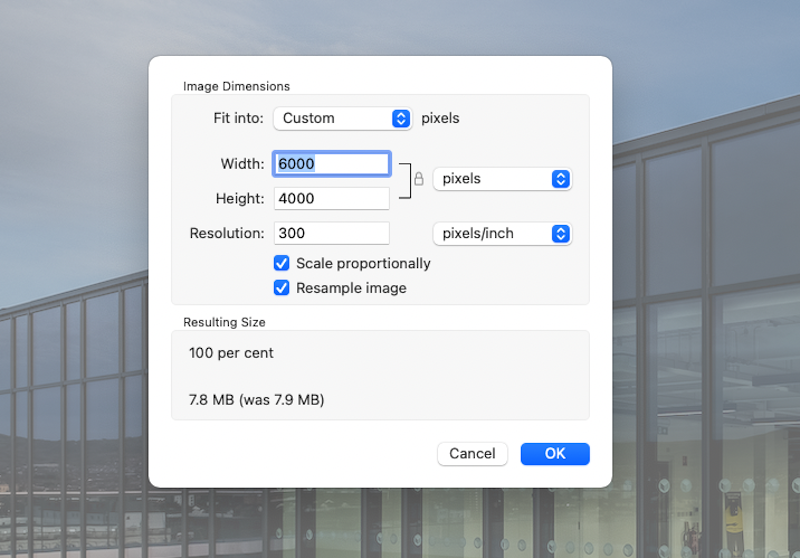
Make sure you keep the boxes next to “Scale Proportionally” and “Resample image” checked otherwise you will distort the image.
As you enter a number into either the Width or Height box, the other box will automatically adjust its number in proportion to the number you just entered.
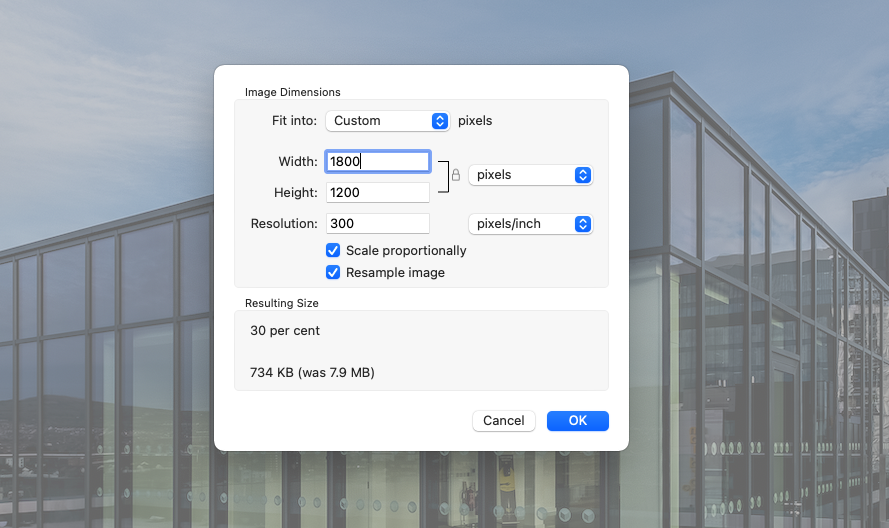
In the “Resulting Size” box you will see the new file size.
Click OK and your image will be saved with the new dimensions. Again, note that the Preview app replaces the original image with the new resized image so make a duplicate if you need both!

